How to Organize Family Photos Without Losing the Story
Learn how to organize family photos with a calm, step-by-step workflow that covers sorting, scanning, naming, backup, and turning memories into keepsakes.
The shoeboxes came down from the attic, the teenager's phone synced to the cloud, and the old laptop on the table still won't turn on. Someone is holding a wedding portrait and wondering whether it's the only copy of a grandmother's face. Around it sit printed snapshots, duplicate downloads, screenshots, and years of camera-roll clutter that nobody has had the heart, time, or confidence to sort.
That's why how to organize family photos isn't really a question about folders. It's a question about stewardship. You're preserving names, dates, places, voices, and small details that can disappear long before the files do.
Table of Contents
- The Family Photo Problem Nobody Wants to Face
- Gather Every Photo Into One Place First
- Sort With Metadata, Not Just Folders
- Digitize Printed Photos Without Damaging Them
- Build a Backup Plan That Survives Real Life
- Turn the Archive Into Shareable Keepsakes
- Keep It From Falling Apart Again
The Family Photo Problem Nobody Wants to Face
A family archive usually becomes urgent at an inconvenient moment. A relative asks who appears in an old wedding portrait, a phone breaks, or an anniversary exposes how many memories remain scattered across albums, devices, and forgotten drives. By then, the problem is larger than untidy storage. It is a backlog of decisions about names, dates, places, and which version of a photograph should survive.
Families add photos faster than they can review them. A 2017 survey of American families found an average of more than 3,600 new photos and videos per year, while the average parent added roughly 250 to 300 items per month (EverPresent family photo survey). Those images often remain divided among several devices and accounts, so no one has a reliable view of the family record.
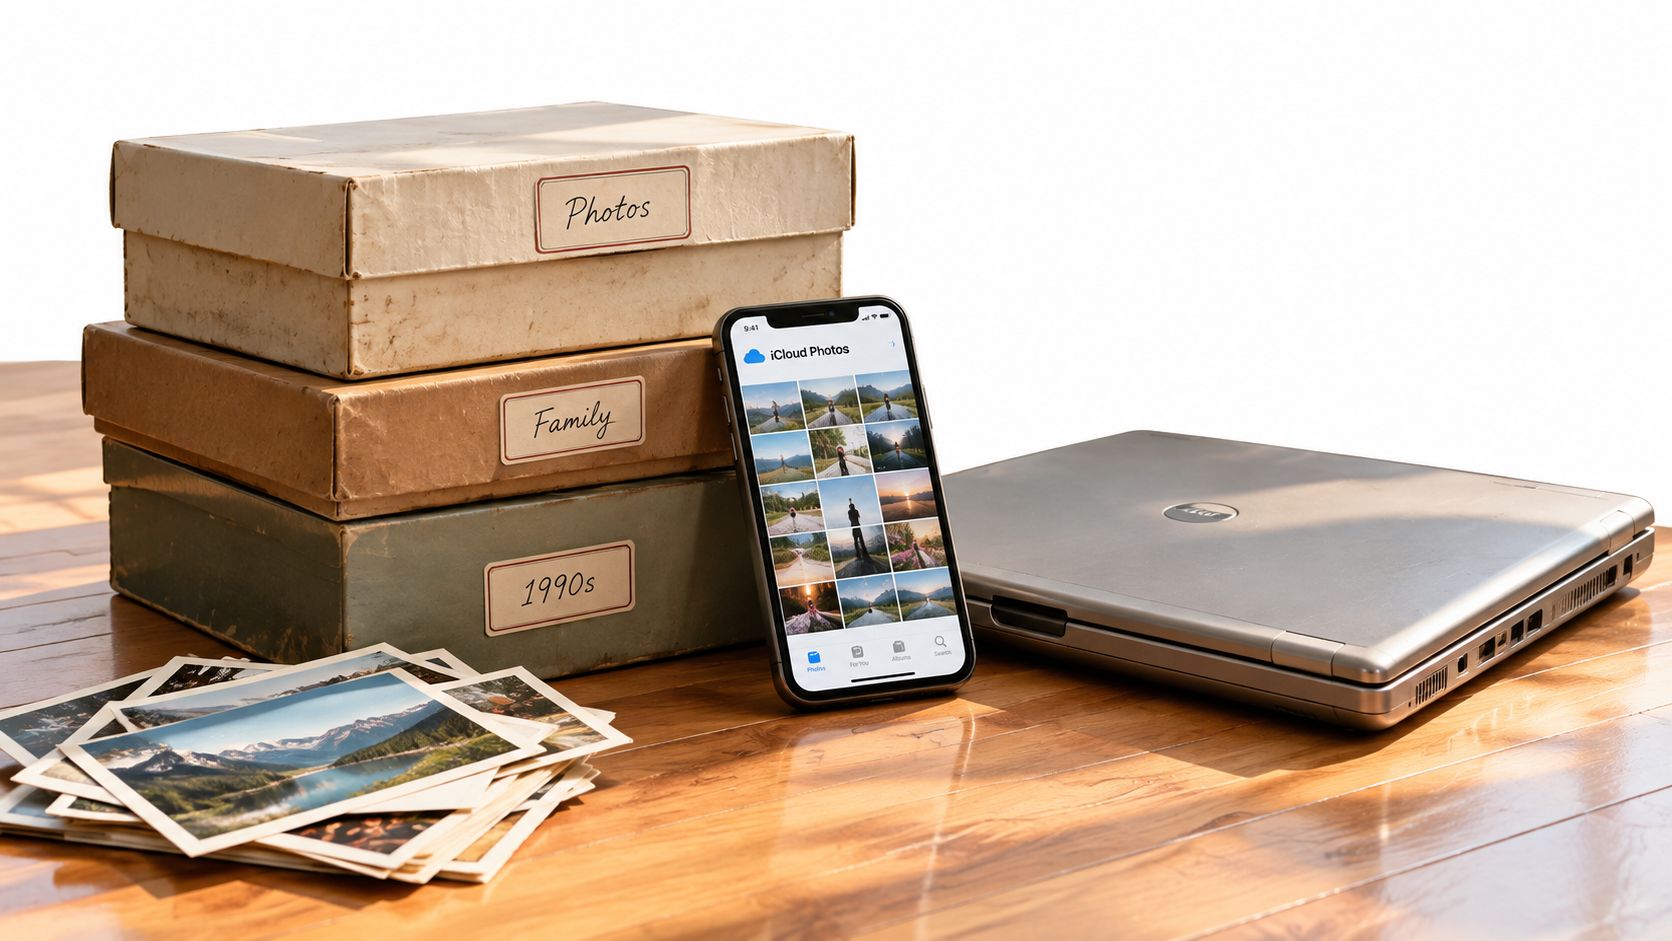
Scattered collections create practical risks: duplicate files, missed backups, and memories that cannot be identified later. A family may have the image but lose the story attached to it because nobody recorded the people, occasion, or location while someone still remembered them.
The work can also feel too large to begin. The survey estimated that catching up with an average backlog would take about 45 hours of manual work, which helps explain why families postpone it until device failure, a death, or a major anniversary makes the need immediate.
The cost of waiting
Delay makes identification harder. Ink on a print can fade, an older relative may no longer recognize everyone in a group photograph, and a damaged hard drive can turn a manageable archive into a specialist recovery problem.
The archive is not finished when the files are tidy. It's finished when someone can understand who, where, when, and why.
Treat this as a legacy project with an organizing plan. Keep awkward portraits, blurry celebrations, and ordinary scenes when they carry meaning. A polished gallery is less valuable than an archive that lets the next generation identify the people and understand the life behind each image.
Gather Every Photo Into One Place First
The family archive often begins in five places at once: a phone in the kitchen, an old laptop in a cupboard, a social-media download, cloud accounts, and printed photos in boxes. Start by bringing those sources into view. Consolidation comes before sorting because names, dates, and family stories are easier to preserve when the full collection is together.
Start with an inventory
List every place that may contain images:
- Phones and tablets: Check current devices, retired phones, and relatives' devices.
- Computers and drives: Include laptops, desktops, USB drives, external hard drives, and memory cards.
- Online accounts: Review cloud libraries, social-media downloads, shared albums, and messaging apps.
- Physical containers: Record albums, envelopes, shoeboxes, framed photographs, and loose prints.
- Scanned collections: Search for folders created by earlier scanning projects or family members.
Choose one master archive before importing files. It may be a dedicated library in Apple Photos, Lightroom, or Google Photos, a clearly named desktop repository, or an external SSD connected to the computer you trust most. The software matters less than the rule: one authoritative working library.
For example, a first inventory might include Mom's iPhone, Dad's Google account, a 2014 external drive, a Facebook download, and three shoeboxes. Bring each source into the same working library, while recording the original source when it helps explain where a photograph came from.
Import first, curate second
Copy files rather than moving them immediately. The original sources remain available while you learn what each collection contains. Use duplicate detection when your software provides it, then review the results yourself. A compressed social-media copy and an original camera file can show the same moment but have different archival value.
| Source Type | Examples | How to Pull From It |
|---|---|---|
| Mobile devices | iPhone, Android phone, tablet | Export the full-resolution library or connect directly to the master computer |
| Computers | Old laptop, desktop, family Mac | Copy image folders and application libraries before retiring the device |
| External media | USB drive, camera card, backup disk | Copy into a temporary intake folder, then compare for duplicates |
| Cloud accounts | Google Photos, iCloud, shared albums | Download originals where available and preserve dates and file details |
| Printed collections | Albums, envelopes, shoeboxes | Scan in batches and keep notes about inscriptions and source containers |
Create a temporary folder named INBOX_NOT_SORTED. Put every new import there. Do not organize files while copying, judging, renaming, and identifying people. Separate those jobs so you can concentrate on the story as well as the file.
Keep notes about inscriptions, handwritten names, and who supplied each box. Those details may be the only evidence a future relative has for understanding an ordinary gathering or an unfamiliar face.
Families comparing online storage choices can use this guide to cloud storage for families when weighing shared access and household use. Whatever destination you select, the first pass is complete only after every known source has been checked.
Sort With Metadata, Not Just Folders
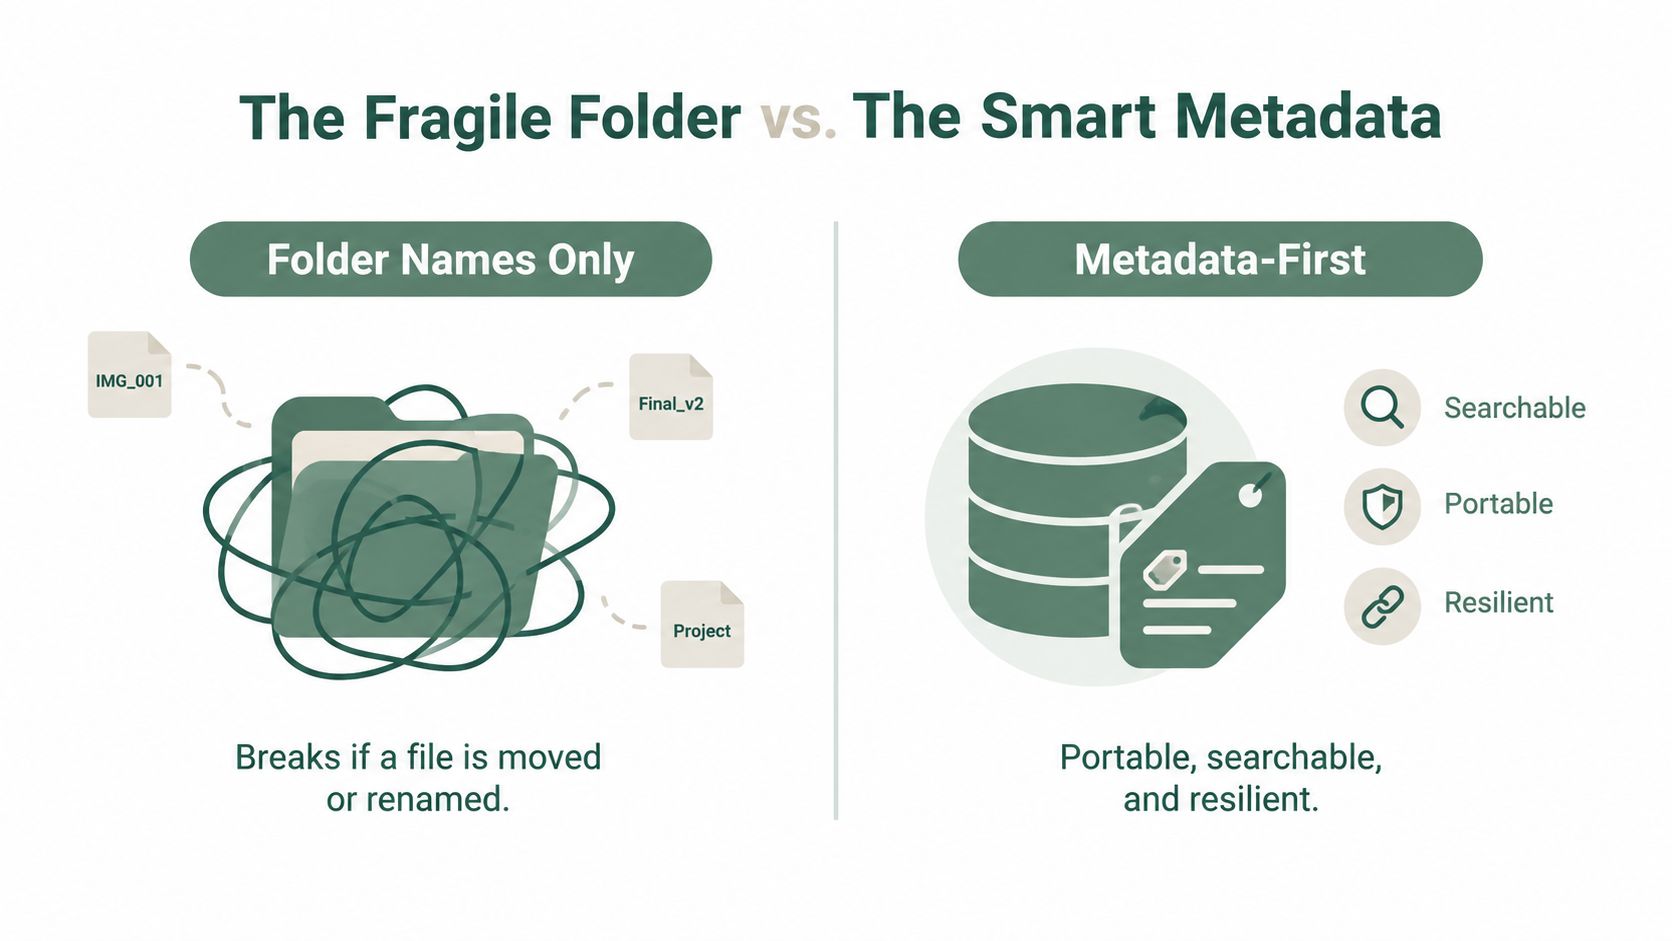
A family archive can outlive its current file structure. Folders provide a visible starting point, but filenames change and files move. Embedded metadata travels with the image more reliably than a folder name alone, so relatives can search, identify, and reuse photographs years later.
IPTC is the widely used standard for descriptive and copyright information in images (IPTC Photo Metadata Standard). Use plain language, and record what a future relative needs to know, not only what you remember today.
Fill the fields that preserve meaning
Prioritize these fields:
- Date: Keep the original capture date in technical metadata when it is correct. For scans and undated prints, enter the best-known date and mark uncertainty in the description.
- People: Add names, not only face-recognition labels. “Aunt Maria” helps. “Person 3” does not.
- Location: Record the town, home, venue, or country. Use the location you know instead of guessing at a precise address.
- Event: Choose consistent wording, such as “Grandma's 70th Birthday” or “First Day of School.”
- Description: Add one sentence of context. “Sarah learned to ride in the front yard while Mom held the seat” preserves more family history than a folder can.
FamilySearch recommends Title, Description, Date, Location, and People as useful metadata fields, providing a practical minimum for household archives. Do not wait for perfect certainty. “Possibly Uncle David, identified by Elaine” gives the next generation something to verify. Silence gives them nothing.
Use folders as the simple visible layer
A chronological structure remains practical:
1994 - Grandma's 70th Birthday1995 - Europe Trip1996 - Kids
For filenames, use a date-first pattern such as YYYY-MM-DD_Event_Number. Rename IMG_4827.jpg to something like 1996-07-14_Sarah-first-bike_Mom-front-yard.jpg. Enter the same names, place, and event in the metadata fields.
The photograph then has several search routes. You can find it through Sarah's name, the front yard, the year, the event, or “first bike.” A folder offers one path. Metadata keeps the story attached to the image.
For guidance on protecting physical and digital collections together, see steps for preserving old photos.
Digitize Printed Photos Without Damaging Them
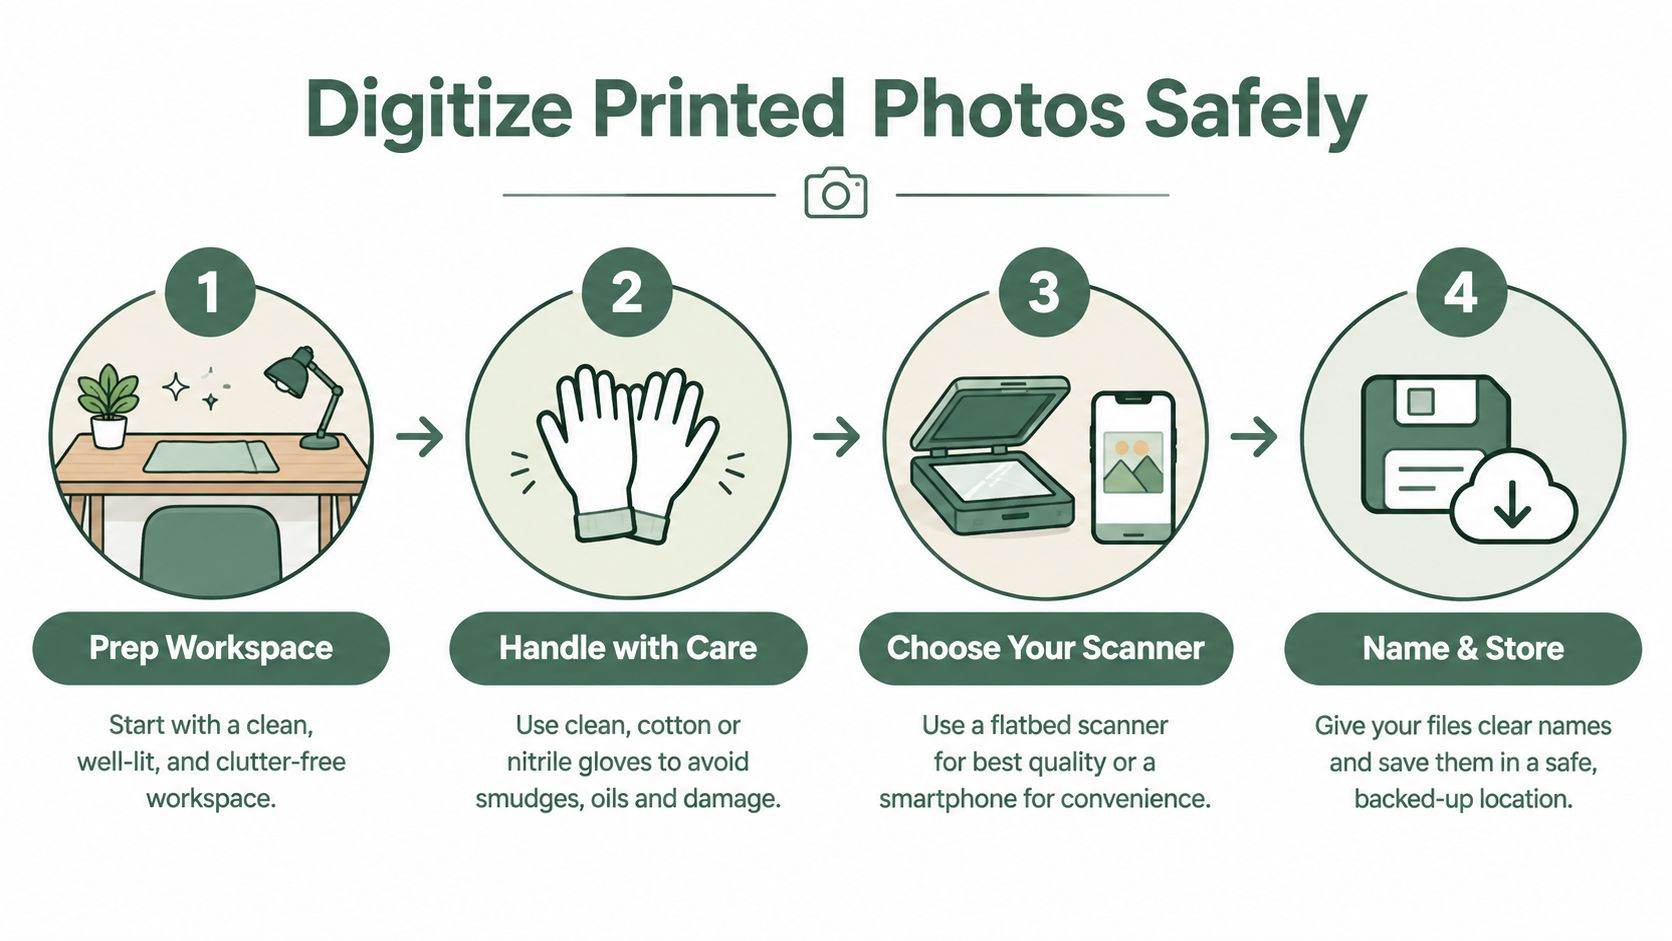
Printed photographs need a slower hand than digital files. Before scanning, clear a clean, dry work surface, wash and dry your hands, remove dust with a soft blower or brush, and keep drinks away from the workspace. Cotton gloves can help with delicate materials, but clean, dry hands often provide better control for ordinary prints.
A flatbed scanner is the safest all-purpose choice for loose photographs because it supports careful placement and produces consistent results. A sheet-feed scanner is faster for suitable, sturdy prints, but it can be a poor choice for curled, torn, sticky, or fragile originals. Smartphone scanning apps are convenient for a quick reference copy, yet they usually give you less control over glare, color, alignment, and fine detail.
Choose quality for the photograph's future use
Use at least 600 dpi for prints you may crop or enlarge. Small, damaged, or especially important originals benefit from 1200 dpi. Save a preservation master as TIFF when your workflow supports it, then create JPEG copies for everyday sharing.
Keep color and contrast neutral during the master scan. Don't “improve” a faded photograph so aggressively that you lose evidence of its original appearance. You can make a separate edited copy later while keeping the untouched scan intact.
Handle difficult originals conservatively
- Sticky prints: Don't pull them apart by force. Photograph or scan them as safely as possible, and seek a conservator if separation could destroy the surface.
- Curled photographs: Use gentle support or a sheet of clean glass to flatten the print during scanning. Don't press heavily on a brittle surface.
- Torn prints: Scan each section separately if necessary, then preserve the original pieces together in an archival enclosure.
- Tape and labels: Don't remove tape just to make the back look clean. It may be holding a fragment or inscription in place.
Before filing the physical print away, capture the writing on its reverse. Put that inscription into the scan's description or a companion note, then use this guide to digitizing old photos for a more detailed workflow. The back of a photo may contain the only surviving clue to its story.
Build a Backup Plan That Survives Real Life
A master library is your working collection, not your backup. It can be damaged, deleted, encrypted, or lost with the computer that stores it. Use the 3-2-1 framework in family language: keep three copies of important files, use two different types of media, and place one copy away from home. This protects more than image files. It also preserves the names, dates, captions, and family context that make the archive useful to the next generation.
Keep the primary library on a computer or external SSD. Store a second local copy on another drive or network-attached storage device. Place the offsite copy with a trusted cloud service or in a secure remote location. Before choosing a cloud service, check its export options, account recovery process, and sharing controls. A service that stores the pictures but leaves the family unable to retrieve them is not a dependable archive.
Match each risk to a safeguard
A flood can destroy both a computer and the drive beside it. Ransomware can reach connected folders. A child can delete a directory, and a forgotten password can lock everyone out of an account. Separate copies reduce these risks, especially when at least one copy stays away from the household's everyday devices.
| What to back up | Where each copy lives | How often to verify |
|---|---|---|
| Master photo files | Primary computer or external SSD | After major imports |
| Local duplicate | Separate external drive or network storage | On a regular household schedule |
| Offsite duplicate | Trusted cloud account or secure remote location | Confirm sync and account access regularly |
| Metadata and captions | Included with the image library plus an exported catalog when available | After substantial editing |
| Scanned masters | Local archive and offsite copy | After each scanning batch |
Synchronization is not versioned backup. If an unwanted change spreads immediately, every synchronized copy may repeat it. Keep at least one backup disconnected when it is not being updated. Protect cloud access with a strong login process that another trusted family member can recover.
Practical rule: A backup you've never restored is an assumption, not a tested safeguard.
Every quarter, restore a selection of files. Open the images, check the dates and captions, and confirm that the restored library still makes sense. Include TIFF masters, ordinary JPEGs, scans, and metadata-rich files. The test only needs to prove that your family can recover both the photographs and their stories when ordinary life goes wrong.
Turn the Archive Into Shareable Keepsakes
A family archive earns its keep when people can open it, recognize themselves, and pass its stories along. Keep the filing system behind the scenes. The finished keepsake should work for relatives who do not share your device, account, or software.
Begin with one bounded story rather than the whole family history. A wedding year, a grandparent's life, a child's early years, or a single move gives the project a clear shape and an emotional center. It also creates a finished result the family can review before choosing the next story.
Choose formats that can travel
A printed photo book suits a story with a beginning, middle, and end. Arrange photographs in a meaningful sequence, then add names, locations, dates, and concise captions. The book can sit on a shelf or travel to a relative who never learned the family's digital filing system.
A slim digital story record works for sharing across households. Put a few photographs on each page and repeat the identifying information there, so the record remains understandable without the original photographer nearby. For a more deliberate narrative, photo essay books provide a useful model for combining images with written context.
A gallery wall needs restraint. Select a small, coherent group of large prints, use one consistent visual treatment, and rotate the display by season, family branch, or story. Showing fewer photographs gives each one room to prompt conversation.
The format should match the handoff. Use a book for a lasting family object, a digital record for relatives in different homes, and a wall display for stories the household should encounter every day.
Write captions for people who weren't there
Captions preserve the meaning that folders cannot. Ask:
- Who is present? Record full names, nicknames, and relationships.
- Where was this taken? Name the house, town, workplace, school, or holiday destination.
- What was happening? Describe the event and the ordinary action around it.
- What detail would disappear first? Mention the car, dress, kitchen, song, joke, or family tradition.
- Why does this image matter? Explain what the photograph means to the person writing the caption.
Keep the wording brief but specific. “David and Noor outside the first house they rented in Leeds, photographed after moving their last boxes inside” gives future readers people, place, action, and significance.
Prints and books make stronger family handoffs than a USB stick in a drawer or a link that expires. Preserve the digital archive, then give its best stories a form that can be picked up, understood, and remembered by the next generation.
Keep It From Falling Apart Again
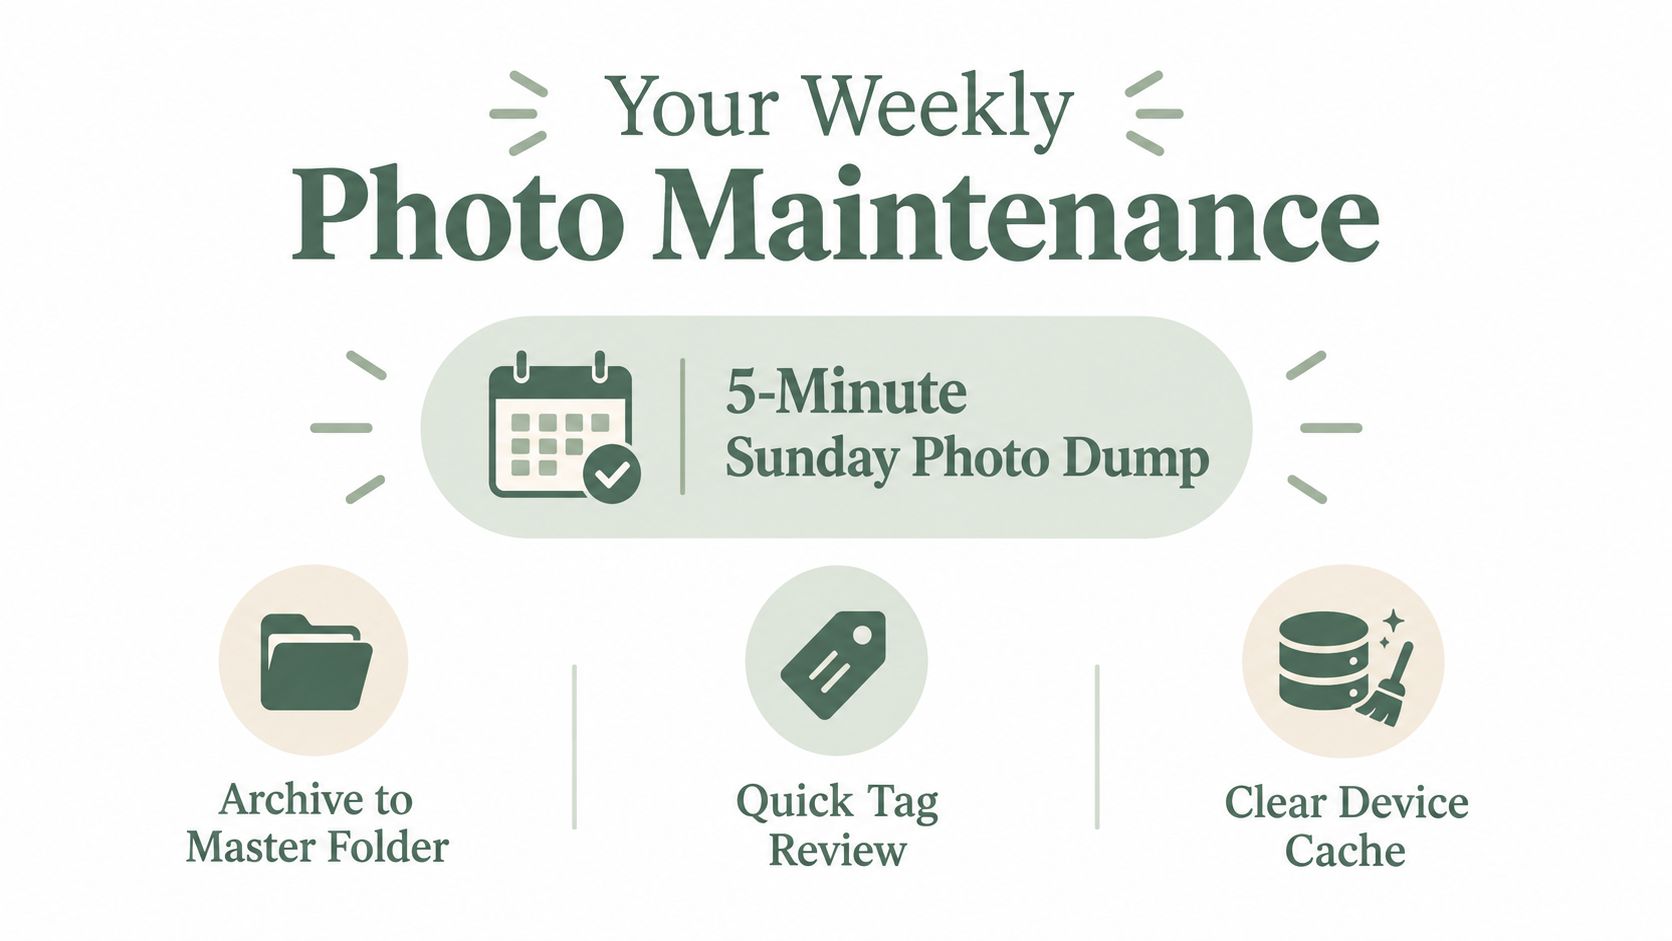
A family archive survives through a small routine, not a heroic cleanup day. Set aside a five-minute Sunday photo dump for new images. Open each household device, import the files into the master library, add a quick tag or event label, and remove only obvious temporary files after confirming the import. Skip full editing. The goal is to keep new pictures from outrunning your attention.
Assign the work before a crisis assigns it
Name one household archive keeper. That person need not complete every task, but must know where the master library is stored, how backups work, and which relatives can identify people in older photographs.
Use a simple calendar:
- Every Sunday: Import new photos, review obvious duplicates, and clear the device cache only after confirming the files arrived.
- Each quarter: Check metadata on recent imports and test a restore from backup.
- Each year: Review account access, backup health, and the condition of physical originals.
- Every five years: Confirm the next family archive keeper and explain the system to adult children or another trusted relative.
A phone full of family photographs becomes harder to interpret after its owner dies. Export the images and notes before closing the account, copy the contents into the master archive, and ask relatives to identify people while those names remain known.
An archive handoff also needs instructions. Give adult children a written folder map, backup locations, naming rules, account-recovery details, and a list of unresolved identities. Keep physical originals in a safe place even when the cloud has an accessible copy. Cloud storage is useful, but it cannot be the family's only record.
For families that want photographs beside names, stories, milestones, voice recordings, and relatives' contributions, remembers.life offers memory profiles, timelines, and a family room for shared additions. Use it as a storytelling layer while preserving original files and maintaining independent backups.
The archive is a legacy project, so preserve the explanations along with the files. Put the routine on the calendar, teach the next keeper, and keep the names and stories attached to the photographs.