Life Story Audio Recording: A Practical Guide
Learn life story audio recording the right way. Practical tips on planning interviews, equipment, technique, editing, and archiving your family's memories.
A Sunday visit can turn into the recording you wish you'd made years earlier. Your grandfather reaches for a memory, loses the thread, laughs, then finds it again through the smell of a kitchen, the sound of a particular door, or a name nobody else remembers. Those details rarely appear in family paperwork, yet they often carry the emotional truth of a life.
Life story audio recording preserves more than words. It keeps the storyteller's accent, rhythm, laughter, hesitation, breathing, and silences. A written memoir can document events, but audio lets future generations hear how someone sounded while remembering them.
Audio is also a practical preservation format, not a novelty. The Audio Publishers Association reported $2.43 billion in U.S. audiobook sales revenue in 2025, with digital audiobooks representing 99% of revenue and more than 750,000 active titles available, according to its reported survey results in the 2025 audiobook sales report. The same report found that 157 million Americans, or 58% of adults, had listened to an audiobook, up from 51% a year earlier. That familiarity with long-form listening gives family recordings a mature ecosystem for playback and sharing.
The craft sits between human comfort and technical discipline. You need thoughtful preparation, dependable equipment, careful interviewing, restrained editing, and an archive that someone can still understand years from now.
Table of Contents
- Why a Life Story Recording Matters
- Preparing the Interview and the Storyteller
- Choosing the Right Recording Setup
- Recording Settings and Session Discipline
- Interview Techniques That Draw Out Real Stories
- Editing for Clarity Without Losing the Person
- Archiving, Sharing, and Preserving for the Future
Why a Life Story Recording Matters
A family interview often begins casually. Someone brings a phone to the table after lunch, asks about childhood, and expects a few entertaining stories. Then the older relative mentions the house they lived in before anyone else was born, the friend who disappeared from family photographs, or the job that shaped every decision that followed. The conversation becomes less like a chat and more like a doorway.
Audio captures the qualities that written notes flatten. A pause before a name can signal tenderness, grief, uncertainty, or simple effort. A laugh can reveal how a memory has changed with time. Dialect and pronunciation can preserve where someone came from, while the sound of a familiar voice can make a distant relative feel present.
This is the difference between a casual interview and archival oral history. A casual recording aims to make a pleasant family keepsake. Archival work also considers consent, context, file integrity, metadata, and future access. The recording should remain understandable and usable after the people who made it are gone.
Practical rule: Preserve the person, not just the information.
The broader audio sector supports this approach. Market reporting placed the global audiobook market in the roughly $7.85 billion to $11 billion range in 2025, with forecasts commonly projecting double-digit compound annual growth through 2030 and beyond, as described in the global audiobook market report. Personal stories fit naturally into an established culture of spoken-word listening.
This guide follows the full preservation loop. You'll prepare the storyteller, choose a setup that doesn't distract, record with archival habits, ask questions that invite scenes, edit without erasing character, and store the result with enough context for future listeners. The methods draw on family story recording guidance and oral-history practice rather than podcasting trends.
Preparing the Interview and the Storyteller
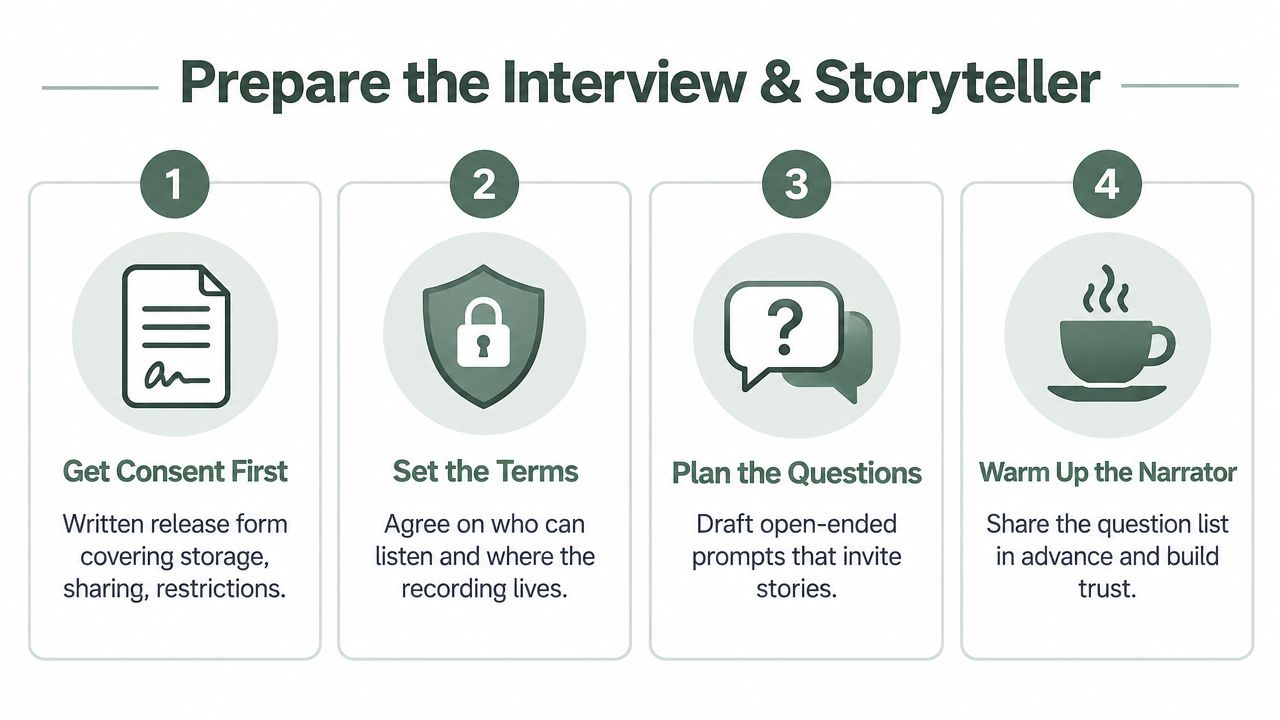
Preparation begins before the microphone appears. The storyteller needs to know why you're recording, who may hear it, and what will happen to the files afterward. A written release form should describe storage, sharing, restrictions, and whether the recording may be copied or deposited with an archive.
Consent isn't a formality. Tell the storyteller they can pause, skip a question, or stop the interview. If a topic is sensitive, agree in advance on whether that passage stays private, remains restricted until a later date, or gets removed from family access.
Build a map, not a script
Research the storyteller's life using family timelines, photo albums, letters, certificates, and conversations with relatives. Don't turn that research into a fact-checking exercise. Use it to identify periods, relationships, places, and objects that can open a memory.
A useful outline follows eras rather than a rigid chronology:
- Early home life: Ask about rooms, routines, neighbors, school, and household rules.
- Work and independence: Explore the first job, daily responsibilities, mentors, frustrations, and turning points.
- Relationships and family: Invite stories about courtship, friendship, parenting, conflict, and belonging.
- Movement and change: Ask about migration, military service, illness, financial hardship, or a new community.
- Meaning and reflection: Leave room for lessons, regrets, jokes, and what the storyteller wants descendants to understand.
Open prompts work better than requests for a list of dates. “What did the kitchen smell like on Sunday mornings?” can produce a scene. “What year did you move?” may produce only a year.
Share the broad question themes before recording if that will reduce anxiety. Plan the session around meals, medication, energy, and rest. Choose a familiar chair, keep water nearby, and decide whether other family members should be present. For sensitive subjects, privacy may help. For a nervous storyteller, a trusted relative may provide reassurance, though that person shouldn't answer on the narrator's behalf.
Use interview questions for grandparents as inspiration, then adapt every prompt to the individual. The best outline is short enough to leave space for an unexpected memory.
Choosing the Right Recording Setup
The room matters more than the price of the microphone. A modest recorder in a quiet room with curtains, rugs, books, and upholstered furniture can produce a more usable interview than an expensive microphone placed beside a refrigerator or HVAC vent.
Start by silencing phones and switching off fans, air conditioners, and other avoidable sources of noise. Oral-history guidance from UCLA's interview guidelines recommends a quiet location, a test recording at the interview site, and placing the microphone as close as possible to the speaker. External microphones are preferable to built-in phone or laptop microphones, which often capture handling noise, room reflections, and uneven distance.
Compare the practical choices
| Setup | Best For | Trade-Offs |
|---|---|---|
| Phone or laptop microphone | A quick informal memory | Convenient, but vulnerable to room noise, handling sounds, and inconsistent microphone distance |
| Handheld digital recorder | A beginner recording at home | Portable and simple, though the operator must manage placement and levels |
| Dedicated recorder with external microphones | Two-person oral-history sessions | Offers independent control, but needs more setup and careful cable management |
| Computer with an external microphone | A fixed room and an operator comfortable with recording software | Allows detailed monitoring and editing, but ties the session to the computer |
| Clip-on microphone | A storyteller who moves or sits far from the recorder | Keeps distance consistent, but clothing movement can create rustle |
For most beginners, a mid-tier handheld digital recorder with a built-in or clip-on stereo microphone is a sensible default. It keeps the equipment visible without putting a computer between you and the storyteller. A dedicated recorder with separate microphones is stronger when interviewer and interviewee need independent tracks, an approach supported by oral-history toolkit guidance.
Match the microphone to the room
An omnidirectional microphone is forgiving when the storyteller moves, but it also captures more of the room. A cardioid microphone rejects sound from behind and can isolate one voice more effectively, provided the speaker stays positioned consistently.
Dynamic microphones tend to be tolerant of untreated home environments and handling, while condenser microphones can capture more detail but may reveal every fan, chair creak, and reflection. The right choice depends on the room and the narrator's comfort, not on a specification sheet.
A recorder that requires the storyteller to lean toward it will change the conversation. Set the microphone close enough that the person can speak naturally, then let the interview feel like a conversation rather than a performance. For more ideas about preserving distinctive voices, see voice preservation resources.
Recording Settings and Session Discipline
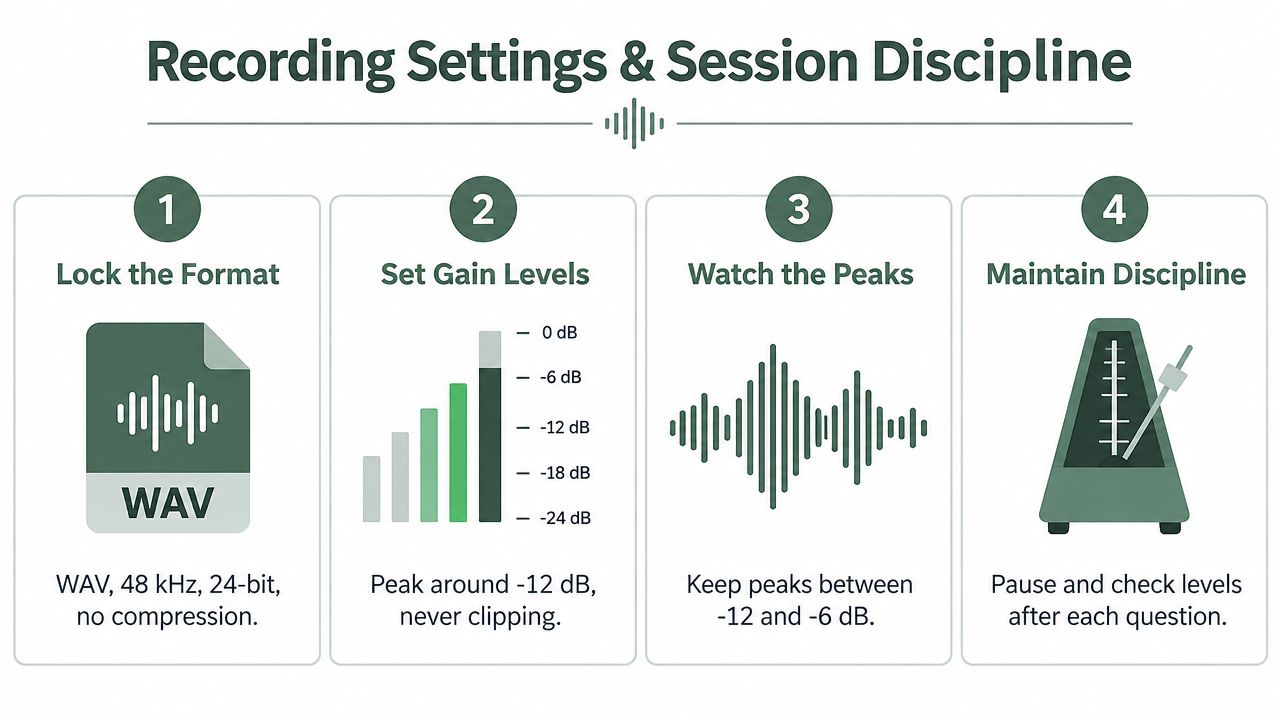
Technical habits protect the story before the first meaningful answer. Set the recorder to uncompressed WAV at 48 kHz and 24-bit, a practical archival benchmark identified in oral-history recording guidance. Use an external microphone when possible, position it about 6 to 12 inches from the narrator, and angle it slightly off-axis to reduce plosives and distortion, following the studio-style recommendations summarized in the verified oral-history guidance.
Set input gain conservatively. Aim for peaks around -12 dB, keeping them between approximately -12 dB and -6 dB rather than pushing toward 0 dB. This leaves headroom for laughter, a raised voice, or an emotional moment. Clipping cannot be repaired convincingly after it happens.
Test the whole chain
Before settling into the interview, record a short sample with each microphone. Ask the storyteller to speak naturally, not perform a loud test phrase. Listen through headphones, check the meter, verify that the file is being written, and listen for refrigerator hum, clothing rustle, chair movement, or a cable rubbing against the table.
NOAA's oral-history guide emphasizes familiarizing yourself with the recorder, making a test recording, monitoring with headphones, checking levels, and documenting metadata after the session. Those habits seem small until a recording fails.
Disable automatic gain control if your device allows it. Automatic systems raise the room during pauses and lower the storyteller during speech, producing a distracting change in ambience and inflection. Avoid relying on a limiter to rescue careless gain settings.
During the conversation, keep the recorder visible so the storyteller knows it's still running. Glance at the meters every few minutes without interrupting the exchange. If the room changes, such as a window opening or a fan starting, make a quiet timestamp note or jot down the approximate location in the session log.
Carry spare batteries and a backup memory card. A second device recording in parallel can provide insurance against card failure or a recorder problem, but it shouldn't replace the primary WAV capture. At the end, stop the file cleanly, label it immediately, and copy the master before editing or deleting anything.
Interview Techniques That Draw Out Real Stories
“Tell me about your childhood” is broad enough to make anyone freeze. A more useful prompt might be, “What did the kitchen smell like on Sunday mornings?” The second question gives the storyteller a sensory doorway. It invites a room, a meal, a person, and a feeling without demanding a perfect summary.
A good interview follows the memory rather than forcing the outline. Suppose you ask about a first job and the storyteller names a coworker, then pauses. Don't rush to the next question or fill the silence. That pause may be where the important story begins.
Let the scene do the work
Try prompts that begin with an experience:
- “What stands out about the house where you grew up?”
- “Who usually sat at the table?”
- “What sound told you that someone had come home?”
- “What meal do you still remember clearly?”
- “Which person made you laugh when life was difficult?”
- “What changed after that move?”
- “What did you carry with you when you left?”
Ask one question at a time. Multi-part questions make the storyteller decide which part to answer and often produce a short, guarded response. An open beginning such as “What stands out about...” leaves room for the narrator to choose the emotional center.
Don't correct a minor date or detail while the story is moving. You can note the uncertainty and return to it later. Interrupting to prove a fact can make the storyteller monitor themselves instead of remembering.
Follow emotion, not just chronology
Reflect what you hear without putting words in the narrator's mouth. “That sounds like it changed everything” acknowledges feeling while leaving the storyteller free to agree, disagree, or explain. Avoid “You must have been devastated,” which supplies an emotion they may not claim.
Keep a small printed prompt list nearby for quiet moments. Include a smell, a sound, a meal, a trip, a loss, and a laugh. These cues are useful when the outline runs out, but don't deploy them to keep the recorder active. A long silence may be more valuable than another question.
The person across from you isn't auditioning for a podcast. They don't need a polished delivery, dramatic structure, or perfect recall. Your job is to create enough safety that they can wander, correct themselves, laugh at an old mistake, and return to the memory in their own way.
Editing for Clarity Without Losing the Person
Editing a life story is an exercise in restraint. Remove a false start that obscures the meaning, a repeated sentence caused by a technical interruption, or a long detour that contributes nothing. Keep the soft “well,” the hesitation before a difficult name, the breath after laughter, and the change in rhythm that reveals the storyteller's presence.
Always protect the original. Copy the WAV into a working folder, edit the duplicate, and keep the raw master sealed in a separate location. If a family member later prefers the unedited version, you should be able to provide it without reconstructing anything.
Make changes you can explain
Start with obvious repairs:
- Trim disruptive silence: Remove pauses longer than four or five seconds when they don't carry emotional meaning. Leave shorter pauses intact.
- Reduce room noise carefully: Apply gentle broadband noise reduction only where the noise floor exceeds roughly -55 dB. Heavy processing can create metallic artifacts.
- Balance the voice: Raise dialogue by about 2 to 4 dB above room tone when needed, but listen for changes in breath and natural dynamics.
- Remove technical interruptions: Cut bumps, microphone handling, coughs, or a conversation that happened after the recorder should have been paused.
- Add section markers: Use meaningful divisions such as early life, migration, marriage, work, and family traditions.
The numeric editing thresholds above are practical starting points, not rules that override your ears. A four-second pause before a parent's name may belong in the story. A two-second gap caused by someone looking for a photograph may also provide useful context.
Avoid aggressive compression and broad equalization for “warmth.” Those tools can make a recording louder or smoother while flattening vocal character. A trembling voice shouldn't be polished into confidence, and a regional accent shouldn't be reshaped to sound generic.
Export a listening copy as an MP3 at 192 kbps, while retaining the uncompressed WAV master. Add a short spoken or written introduction only if the storyteller agrees. Good editing should make the story easier to follow without making the listener forget that a real person is speaking.
Archiving, Sharing, and Preserving for the Future
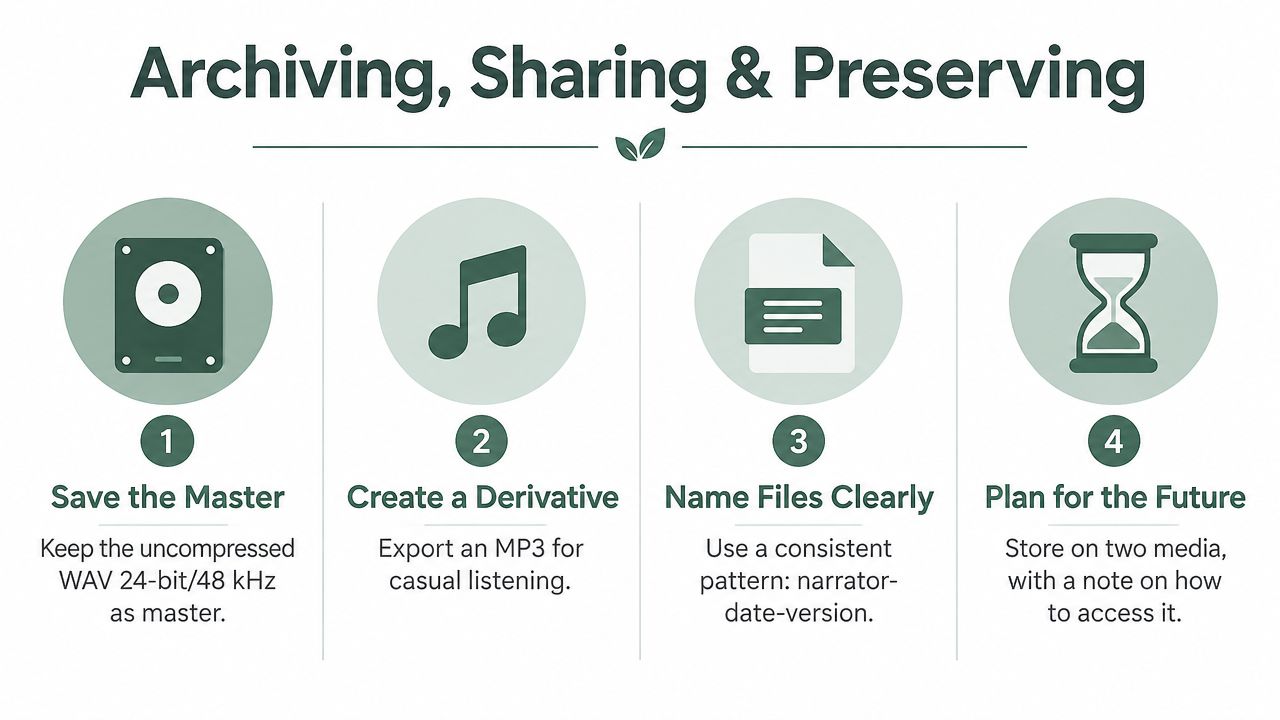
The archive begins when the session ends. Keep the uncompressed master as a WAV file at 24-bit and 48 kHz, then create an MP3 derivative for convenient listening. WAV is a stable, widely supported format, while a proprietary project file may depend on software that future family members can't open.
Use a consistent filename that answers basic questions at a glance. A practical pattern is interviewee-name_date_location_sequence-number, with the exact date format chosen once and used consistently. Don't rely on a folder called “Grandpa recordings.” Future listeners need to know who is speaking, when the session happened, where it took place, and whether the file is part of a larger series.
Keep more than one usable copy
Apply the 3-2-1 backup rule in a way your family can maintain:
- Three copies: Keep the master in more than one location, not only on the recording device.
- Two different media: Use a local computer or drive plus a separate external SSD or another storage medium.
- One offsite copy: Store at least one copy away from the home, such as with a reputable cloud storage provider.
Services such as Backblaze, iCloud, or Google Drive can serve as offsite options, but confirm that the original WAV files are uploaded and can be downloaded. Cloud storage for families can also be part of a broader plan, provided the family documents access and permissions.
Keep the consent form beside the audio, not in an unrelated filing cabinet. Add a written summary, session log, names of people and places mentioned, topics covered, and any restrictions on listening or sharing. A future grandchild may recognize the voice but have no idea who “Aunt May” was or why the factory mattered.
Design for future listeners
Review the storage plan periodically. Hardware fails, connectors change, passwords get lost, and cloud accounts can become inaccessible. Migrating files to current storage every 5 to 10 years is a sensible preservation practice, especially when the original drive is aging or the family no longer owns a compatible computer.
Sharing should follow the storyteller's permissions. You might send private family links, give relatives USB drives, or offer a copy to a local oral-history archive. A printed transcript adds accessibility and makes names, places, and subjects searchable, but it shouldn't replace the audio. The transcript preserves content. The recording preserves the person.
A platform such as remembers.life can hold a voice recording inside a memory profile, automatically transcribe recorded audio, store the transcript in a searchable archive, and accept an existing audio file uploaded as a voice note attached to a story. That can complement your master-file archive, as long as you retain your own uncompressed original and preserve the consent information separately.
The finished recording is more than a file. It's a relationship turned into an artifact, with enough technical care to survive and enough human texture to remain worth hearing. Start with the storyteller's comfort, protect the capture, document the context, and make access intentional.
If you're ready to preserve a parent's, grandparent's, or loved one's voice, visit remembers.life to record or upload spoken memories, keep the accompanying transcript searchable, and give your family a lasting place for the story. Begin with one conversation, one familiar question, and one carefully preserved voice.